360 degree camera and creating HDR 360 Spherical maps for IBL use

A fellow teacher at the Studio Arts program, hooked me up with this latest tidbit of an easy way of shooting and creating your own Spherical HDR Maps. Kodak has a camera out called Pixpro SP360 Action Cam. It’s a pretty inexpensive camera that shoots photos and video at 360 Degrees.

kodak_pixpro_sp360

It can shoot HD Video, capture 16mp sensor, WIFI enabled, and has simple apps to control via your Smart Phone. There is a whole host of things you can do with the camera, check out here.

It’s easy to setup and use via the phone app. Sync with WIFI between camera and phone. You basically choose between shooting Video or Photo and then choose what type of format you want to record your image in; Dome, Panorama, Front, Segment, Ring. I shot in Dome mode.

sp360_app

The app is very intuitive. Click, drag, and toggle basically. The range of app linked to your phone is a distance of 65 feet. It has an interactive display of what you are shooting and how it will look in whatever mode you shoot in. Click “EV” and you can bracket your exposures.

sp360_app2

Slide the Exposure left or right and click to take photo to get your bracketing.

Now you just assemble the photos in Photoshop. I did mine as a Equirectangular format for the Spherical Panorama. There’s a couple ways to do this.

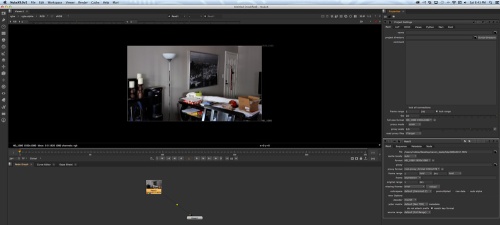
What I did is import the files to Photoshop by “File -Automate- Merge HDR PRo”. Navigate to your photos and batch install them. Make sure “Attempt to Automatically Align Source Images” is off. This will pixel shift your image file size.

turn_off_align

Click Ok. This will bring up HDR Pro dialog box.

hdrPro_convert

Bottom left showing your bracketed exposures.

hdrPro_convert_bracket_exposures

In HDR Pro, change to 32 bit and depending on the version of Photoshop, turn off “Complete Toning in Adobe Camera Raw”.

hdr_pro_result

Now you have an image with full dynamic range. You can create an exposure node on the file and test it if you’d like. You should be able to dial in and out the brightest and darkest of image and still see either sun glow or shadow details.

You could also resize your image to gain a little image depth, so you can go Image – Image Size and change percent for whole image to 200% to double it up.

Change the file to prepare it for an equirectangular image, we need to be at a 2:1 ratio (360 degrees wide to 180 degrees high). Go Filter – Distort – Polar Coordinates.

polar_to_rectangular

Switch to “Polar to Rectangular”. This is what your image will look like now.

rectangular_now

**Something to note depending on what version of Photoshop you have you may need to go about this in a different order. In earlier versions of PS when in 32 bit you may not have the Filter icon active. So if this is the case you’ll do the polar coordinate step first on all of your images before hand and then re-import them with the “Merge to HDR Pro step”**

The image needs a little resize due to your lens height. We don’t have a full 360 coverage in height (y). The camera lens is an 214 degree ultra wide. We’ll do a quick fix on this. So  214 will be divided by 360 which is 59.44 percent. You will transform your image height to 59.44 percent. Command + T and change height to 59.44.

transform_59pt44

Using “Snap” under “View-Snap to-Document Bounds” you can move up the picture to top of frame. Now to finish the convert to 2:1, do a covert Image-Image Size, make width 200% (or make height 50%).

drag_copy_down

To fill in bottom of image, use the marquee tool drag rectangle across bottom and copy paste the element, then “control + t” and drag bottom manipulator handle down to bottom of document to stretch the pixels.

Save out your final image as an EXR format file.  Final image ready for use in favorite 3d software package as an Image Based Lighting (IBL).

ibl_image

IBL in Maya for example.

360_pano_ibl_in_maya

Here is a good test render using this map on some simple geometry. This scene is only lit using the IBL map in the scene. Behind the back striped wall the trees and sky are from a photo I took.

Now there are higher resolution ways to generate an HDR Spherical Map but really without stitching and all kinds of additional steps this is a pretty quick and inexpensive way to gather up a reference library of HDR Panoramas for IBL usage.

Volumetric Fog

So to add fog to my scenes, I add Volumetric fog.  Go to  Create–Volume Primative — Cube.

You will see “box1” pop up in outliner.  You will scale the box to size you need it for your scene. The center of the cube is where the fog will be the thickest.

volumetric_fog_box1

In the attribute shape node of it, under Render Stats, you will want to turn on “Volume Samples Override”.

volume_samples_override

This fog is a true volumetric fog and supports raytraced shadows. It will create shafts of light rays in your scene.

The fog volume creates it’s own shader. You will want to turn on “Illuminated” this will allow your fog to be light by your light source (you can choose to not have the light illuminate it).

When rendering you will want to create a new scene file to allow your scene to render out the fog passes. You will create a lambert shader that has it’s color turned to black. Then you will switch under “matte opacity” from normal to Black Hole. This will allow your geometry to render out black in RGB and alpha causing a cutout while your fog will render white.

matte_opacity_black_hole

Render out your various fog passes. You can create multiple fog effects and render out as  it’s own pass to then composite afterwards. These render very fast.

fog_render

Jack “the King” Kirby (1917-1994)

There was an amazing exhibit of Jack Kirby’s comic book artwork on display at CSUN. I was lucky enough to see it with a friend before the show closed down. Kirby is by far one of the most prolific and influential comic book artists/creators the medium has seen (and quite possibly ever see). Most people know of Stan Lee but many do not know Kirby. Without Kirby there really would not be a “Marvel” today.  His touch on the medium (especially the Stan Lee years) have created the look of what we know of comics today. He co-created Captain America, Fantastic Four, Thor, X-men, and the Hulk, and many more.

IMG_6045IMG_6014IMG_6024IMG_6018

Something I did not know is he co-created with Joe Simon the genre of romance comics. Which during their heyday accounted for 1/4 of total comic sales.

IMG_6027

IMG_6029

Kirby became the style of Marvel. All new artists were to emulate and go thru a Kirby-esque training regime. Kirby also worked after feeling stymied at Marvel for DC comics as well. Creating an amazing mythos for them, The Fourth World saga. It comprised of the New Gods, Mister Miracle, the Forever people, and more. While at DC he also created OMAC, Kamandi, the Demon, and many more.

IMG_6041IMG_6007 IMG_6008IMG_6005

I grew up reading comics by some of my most favorite artists/writers of my time period. I was introduced to the likes of John Byrne, Alan Davis, Jim Lee, George Perez, Marv Wolfman, Peter David, etc. When you look at the work that they did it all stems from the ground work of Kirby. The amazing thing of all this hard work it was when the industry paid very little for the pain, sweat and tears of these creators. Most were forced into Work for Hire contracts. It’s hard to imagine now with the powerhouse of comics in the Movie industry and in Toys, but most to almost all of the creators never received any major restitution.

It was humbling seeing the prolific nature of his work and knowing the effect of his creations on the history of comic books. Anyway I just wanted to share a little on this great man.

Using Tracked Live Footage for your CG camera

Back in June, I wrote about “Adding Life to CG Camera Move“. This time around I wanted to show another way to add realistic camera movement to a CG Camera by importing tracked footage shot by an actual camera. You can film your camera move on a physical camera mirroring the camera move you were hoping to achieve in CG. Then you can camera track that footage to ingest it into your 3d package of choice. Once it’s in CG you can then tweak the tracked camera to fit your needs and have all of the lovely subtle nuances of a hand filmed camera move.

First I recorded a camera move that would work for me. I tried to match my cg scenes conditions (ISO, Aperture, and lens).

Here is the footage at half resolution on you tube

Now we’ll bring this footage into Nuke to track in a Read node. You could track your footage in something like AfterEffects or whatever program of your choosing. Make sure your project settings matches your footage settings.

1_footage_in_nuke

Add a tracker node below it. Input your data for your camera, like Lens (Focal Length) and Camera settings (Film Back Settings). For me, was a DSLR camera. Use the video selection, not the image still since the sensor parameter is different. Now you can click “track” whenever you are ready to track the footage.

2_add_camera_tracker

In the Settings tab, you can up the “Number of Features” to a higher amount say 300 or 450 to sample more. Click on “Refine Feature Locations” and “Preview Features”. You can also decrease the “Keyframe Spacing” to get a more accurate track.

3_camera_tracker_settings

Click to “solve” the track. Now you will want to dial in the accuracy of the track. You can delete tracks that are no good (red markers). Tweak the Max Track Error and Max Error under the “AutoTracks” tab. The Red tracks are the rejected tracks so you could also click “Delete Rejected”. You will want to save a previous version of your file when doing this.

4_refine_track

Now you can click over the main window and click “Tab” to scroll to the 3d viewer. You will see your tracked data in a point cloud view of sorts. What you will notice at first is your camera is angled and not oriented in correct 3d space. You have to tell Nuke what and where the camera is pointing.

5_3d_view_0f_camera_data

Click Tab again and you’re back in 2d view. You will select some of the tracked points to orient your scene. First off establishing your ground plane. Once selected appropriate tracks, right click and go down to Ground Plane–Set to Selected. If you go back to 3d you will have seen your camera rise up and level up to the ground. Now you can go back and set X or set Y and so on. Select two points in your camera tracked data to establish scale. Right click and select Scene–Add Scale Distance. In the Scene tab, click on Distance and enter the scale between the points. This will scale your scene to the measurement.

6_select_track_point_set_3d

Once you’ve gotten all that sorted out, you can export out your tracked camera as a Camera only or a Scene. In our case we’ll do Scene.

7_export_scene

This will generate a scene node and a camera node will be created in Nuke. You can create a piece of geometry say a sphere (you’ll need to scale it down) and test it by hooking it up to a scanline node. The scanline node will then hook to your camera and the BG can be temporarily hooked to your original footage. Scrub through viewing from the Scanline node to see how your sphere object tracks to your camera. It should stick to the camera movement correctly.

10_scene_nodes

Now hook up what you want to export out of Nuke to the scene node. If you want the test sphere hook that to scene, you can add axis nodes (any of the camera track nodes for spatial info), and the camera. Don’t hook up the CameraTrackerPointCloud unless you really need since it will given your a ton of locator points in Maya.  Below the Scene node, add a WriteGeo node. Here you will select the folder where you want to save your exported doc. Add “.fbx” for file name. Nuke will automatically give you a drop down of file options you will want to include or not. Click “Execute”.

11_writeGeo

In Maya, you will import your new camera as the fbx file to whatever 3d scene you want to use the camera in. Group the nodes if you like. You can scale them all and reorient them as you like. Now you are free to use whatever of the camera data that you’d like.

Here’s the footage in Maya with my scene, roughly placed in a scene.

It’s nothing special yet, but you get the idea. You can retime the footage, alter the key frames, or whatever. You could add a simple handheld shot just to have organic jitter to a cg camera. There are a bunch of various ways to use this data.