Maya Mental Ray – Physical Sun and Sky
Switching from Exposure Simple to Exposure Photographic
Create Physical Sun and Sky. Render Settings, select Mental Ray. Under “Indirect Lighting” tab, Environment click “create” under Physical Sun and Sky button.
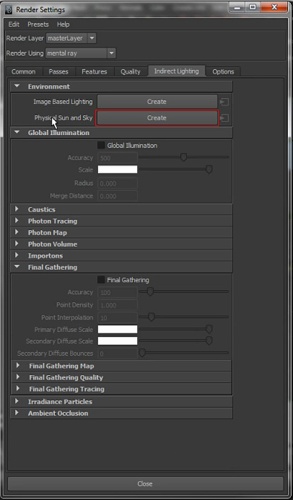
This creates a “sunDirection” light in your scene. Rotate this sun Light to position the Sun’s angle. Physically translating this light does not change it’s angle, only the rotation does. It is basically a Directional Light with extra bells and whistles.
It also creates a “mia_exposure_simple node” that is attached to your camera and is visible in a tab for your camera’s attributes. Now the parameters of this node aren’t as user friendly as one would like. You have gamma and gain that seem to make sense, but the rest aren’t as apparent (at least to me).
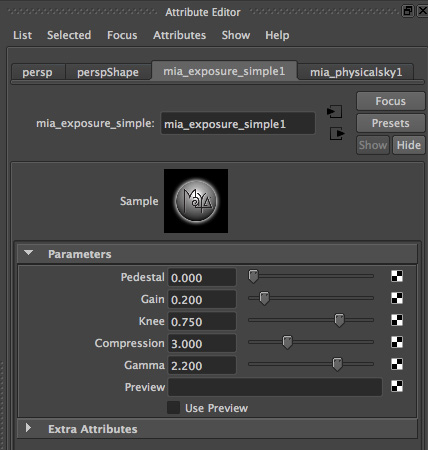
Now based on the settings of the Exposure Simple, I can Gamma or Gain the image, but rest of the terms (Pedestal, Knee, Compression) I don’t know what they mean or will do.
This is the reason want to switch to the “mia_exposure_photographic” node.
 Now this node has more options and they are listed in more photographic terms; ISO, camera shutter, F number (F-stop), burning highlights, crushing blacks, and etc.
To swap from the “Exposure_Simple” node to the “Exposure Photographic” node, select your camera, then go to “Window–Hypergraph:Connections”.
Now open up Hypershade, click on Mental Ray—Lens, then click on the “mia_exposure_photographic” node.

This creates the “mia_exposure_photographic” node and you’ll see it appear in the Hypergraph Connection windows.

Now you can swap them out. Click the “exposure_photographic” node, middle mouse drag to the shot_camShape. A “Plus” sign will appear and release middle mouse button.
Now it will ask you where to assign the connection. Click “Default”.
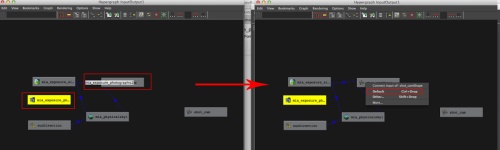
This assigned the Exposure Photographic to the Camera.
Now you need to assign it to the Physical Sky node. So you will click the Exposure Photographic and middle mouse drag it onto the “Physical Sky” node. This time you will click “Other”.

A pop-up dialog opens where you need to select certain input and output connections, but by default they are hidden so you have to turn on “show hidden”
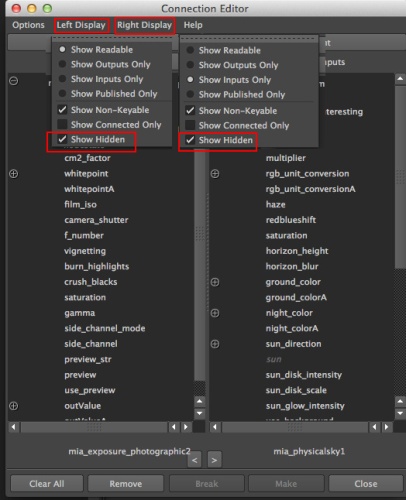
Now click “message” on Output, and “miSkyExposure” on Input.

You will see the connections change. Now you can delete the “mia_exposure_simple” if you’d like.
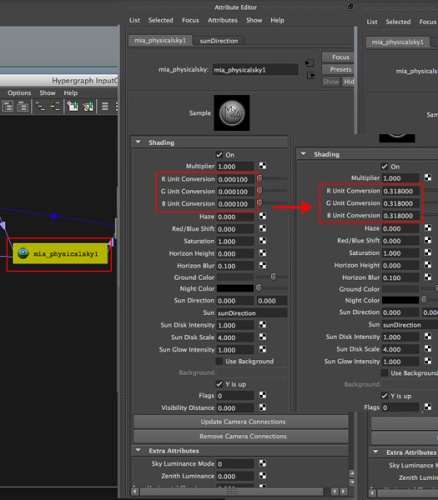
Now you just need to change your RGB space for the Exposure node. Click the Physical Sky.
In it’s attributes, change the R, G, and B values to .318 for each.
Another piece to change is to render with a MIA Material when using Mental Ray and because we’re dealing with Exposure nodes (whether exposure_simple or exposure_photographic) you’ll need to gamma correct the shader as well.
So first, let’s create an MIA material X.

Graph the MIA shader by clicking Input/Output setttings.

And now you’ll just need to add a Gamma correct node to it.
In Hypergraph, select Utilities — Gamma Correct.

Now, select the Gamma Correct, middle mouse click it onto the MIA shader and assign to Diffuse. The Gamma Correct needs to be assigned to the correct color space for 2.20 Gamma so enter .454 in it’s settings.

Now you have a balanced 50% grey shader and when you input a file texture it will be color corrected for your renders.
You can update all your cameras by going to Physical_sky tab on the camera your converted, and at bottom “Update Camera Connections”. Now all your scene cameras will have the update.
That’s basically it.


